

Gallery walls are popular for a reason - it's the perfect way to showcase photos in an aesthetically pleasing way in your home. I'm a big fan of using family photos as wall art in certain areas of our house. In our living room, we have a huge wall behind our couch. When we first moved in two years ago, I started searching for a beautiful painting or cool piece of art but between the price and commitment, it didn't align.
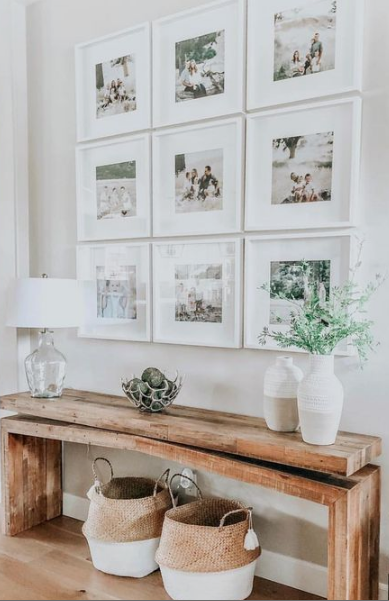
I shifted my focus to creating a gallery wall of some of our favorite photos. I decided to only use pictures with Jack, Greg and I - no other family or friends so no one feels left out when they are visiting. After narrowing down the options, with an assortment of photos ranging from different years and locations, I thought it was best to turn each photo black & white to keep it cohesive.
I found simple square frames with a black frame and white mat, and used the measurements to map out the size on the wall to see how many total photos would look best. I landed on 15 - 3 rows with 5 across. I then planned the layout on excel to make sure we had the right mix including candid photos & landscapes from adventures, and special moments & milestones, etc. I ordered matte prints online though Walgreens. I've used mpix too, and they have good quality.
Greg and my dad installed the gallery wall with my direction. This actually went up during Super Bowl 2020. I watched the J. Lo and Shakira halftime show and the guys were measuring and hanging - they're the best :)

We used 3M picture hanging tabs for multiple reasons: no damage to the wall, the frames won't budge or ever be crooked, easier to hang and ensure they are level. We placed the frames with one inch between each. To do this, we cut out a 1-inch piece of carboard and used it as a guide to make sure the next frame was positioned correctly.
After measuring the wall and marking the center, we figured out how low the bottom row should be since it's above the couch and don't want someone accidentally hitting their head on a frame. I put the photos in all the frames, cleaned them with Windex, and applied the 3M strips to the back. We started with the bottom middle frame, then the middle center, and middle top - and working our way out from there. Each frame was measured using the 1-inch cardboard cutout and a level.
The final result is the gallery wall of my dreams! Our living room is where we spend the most of our time at home, and is open to the kitchen so we see it often. We've received so many compliments from family and friends on how well it turned out and have inspired loved ones to create their own black & white gallery wall. I can attest that not one frame has moved out of place (thanks 3M!). I love that we can always swap out a photo or two to refresh but some will always stay - looking at you, proposal shot!

+ printed photos
+ frames with mat
+ 3M picture hanging strips
+ cardboard cut to the size of the distance between frames
+ a level
The options are endless with gallery walls! You could use different size photos and arrange them in a more free-flow placement, keep the photos in their true color (great if you're using an assortment of images from a professional photography session), arrange frames on a ledge instead of hanging, or skip the family photos altogether and mix a collection of different artwork mediums (think paintings, mirrors, sculptural elements, etc). Sharing a few ideas from Pinterest below for inspiration.


No comments:
Post a Comment